Bicycle Wheel Removal And Installation

By: Matt Donovan,
3rd generation Owner and General Manager of Dedham Bike
Last updated: 8/2/23
This article explains bicycle wheel removal and installation. The wheel must be removed to replace the tube and tire. If possible, begin by mounting your bike in a repair stand. If no stand is available, you can loosen the wheel and then lift the bicycle by hand to remove the wheel. Once the wheel is removed, if you lay the bike on its side, be sure to rest it on its left side (non-drivetrain side). This will keep the chain from getting dirty and prevent any possible drivetrain damage. Never stand the bike upright without the rear wheel in place, as this will damage the rear derailleur.
Bicycles wheels often feature quick-release levers at the hubs that hold the wheel on. The quick release is a cam mechanism that holds the wheel tightly in place and makes it possible to remove the wheels without tools.
How To Remove A Bike Wheel
Step 1. To remove rear wheels, first pedal by hand and shift the chain onto the outermost (smallest) cassette cog (rear wheel), and the innermost (smallest) front chainring on the crankset.
Step 2. Open the brake to provide more clearance for the wheel to pass through. Many types of brakes have mechanisms that makes this easy called brake quick-releases. Typical brake quick-release mechanisms are shown below.
Step 3. Open the wheel quick release by pulling its lever outward. If necessary, hold the lever while turning the quick-release adjusting nut counterclockwise so that the quick release will clear any tabs at the end of fork and you can remove the wheel. For wheels with axle nuts, loosen both nuts.
Note that for front wheels, you just push them down and out of the fork.
For rear wheels, it helps to pull back on the rear derailleur to allow the cassette cogs on the rear wheel to come off the chain. Guide the rear wheel down, through the brake pads and forward to clear the chain and derailleur.
Through-Axle Wheel Removal
Downhill and freeride mountain bikes may use a through-axle system, which means the ends of the wheel's axle are completely enclosed and held by the frame for a super rigid and secure interface. There are different designs and wheel removal varies slightly. The basic procedure is to loosen the pinch bolt(s) and then remove the axle from hub and remove the wheel. Or, on some, you free the axle from the mechanism that's holding it and remove the wheel.
RockShox, Fox Racing, and other manufacturers offer a through-axle system with a quick-release skewer(s). These systems are similar to conventional systems in that by opening the quick release(s) you can remove the wheel.
Note that the axle usually has threading on one side and is fit through the dropout and through the hub. A lever system rotates the axle and threads, snugging it in the dropout. The axle is then held secure by the quick release. The quick release (or in some brands, the double quick release) is adjusted so that there is resistance approximately halfway through the swing from open to closed.
Open the cam (if present) and unthread the axle from the fork.
Some through axle models will have no quick release set up but may have a fitting for an allen wrench which you would use to unthread the axle.
Pull the axle from the hub.
How To Install A Bike Wheel
(Video Below)
1. Check that the quick-release lever is in open position. Check that brake quick-release mechanism is open.
2. Install the front wheel between the dropouts with the skewer on left side (from the rider's point of view). Pull, or if the wheel's on the ground, push the wheel fully up into the dropouts. For non quick-release wheels with axle nuts, the washers go to the outside of the dropouts.
3. For rear wheels, pull back on the rear derailleur to provide more chain clearance. Place the smallest cassette cog on the rear wheel between the upper and lower sections of chain. Guide the wheel between the brake pads and make sure the chain is on the smallest cog.
4. Close the quick release in the right position. To do this, rotate the front lever and adjusting nut so that the lever (when tight), will end up just in front of the fork. Position the rear lever so that when it's tight, it falls between the chainstay and seatstay. Reposition the lever as necessary if it will not fully close. On some frames you may need to locate the rear quick-release lever beneath the chainstay.
5. To get the tighteness of most quick releases correct, rotate the lever halfway through its swing from fully open to fully closed. Then, while holding the lever, tighten the quick-release's adjusting nut clockwise until it's snug against the dropout. Check the result by moving the lever back and forth through its swing. The lever should start to feel snug halfway through its swing and be fully tight when fully closed against the frame.
6. For non quick-release wheels, tighten the axle nuts fully.
7. Close the brake quick-release mechanism. Check the the wheel centering in the fork. The wheel should be centered between the fork blades. To adjust wheel centering, open the quick release, move the wheel either left or right until the wheel appears centered, then close the quick release. For non-quick release wheels, loosen the axle nuts and center the wheel, then tighten the nuts fully.
8. Inspect the brake alignment to make sure it's not rubbing. If the brake is rubbing or not centered, it's usually because the wheel isn't centered so loosen it and try again.
9. Spin the wheel and double check the brake pad alignment to the rim.
10. Double check that the quick release levers are closed fully.
11. Double check that the brake is closed or hooked back up.
12. View the centering of the rear wheel between the chainstays and seatstays. Also, sight the rim centering between the brake pads. Open the skewer or loosen the axle nuts and adjust as necessary to center the wheel in the frame.
If the brake pads are not adequately centered over the wheel you may need to adjust the brakes. If further attempts to align the wheel fail to adequately center it in frame, either the frame or wheel may be miss aligned. Seek a professional mechanic for help.
Note: Certain quick releases use an exposed cam mechanism and these can need to be lubricated frequently to work properly and tighten sufficiently. Always check the instructions for your quick releases or ask us if you have questions.
Closed the quick release cam lever.
Installing Disc Brake Wheels
Wheels using disc brakes need special attention regarding quick-release skewer use. Rim brake systems (dual-pivot, linear-pull, cantilever, sidepull, etc.) tend not to apply significant pressure on the axle. Disc brake systems are mounted on the fork and apply a load on the rotor, which is attached to the hub. There is an outward load on the hub axle that tends to push the axle out of the dropout. It is especially critical the skewer be properly and fully secure on disc brake systems.
It is especially critical the skewer be properly and fully secure on disc brake systems.
Non quick-release wheels use are held tightly on the frame by axle nuts. The axle nuts will have a washer built in, or a separate washer. If the washer has teeth or knurling, these face the dropout to help secure the wheel. Be sure to lubricate the axle threads with oil or grease.
It is often easiest to install the front wheel when the bike is standing. This lets you push down to ensure that the axle is fully inserted in both sides of the fork so that the quick-release skewer can fully engage the dropout surfaces.
Installing A Through-Axle Bike Wheel
Wheels must be properly mounted to the bicycle frame. Misalignment can result in problems with braking, shifting and bike handling. If the wheel is not securely mounted in the dropouts, it may come out when the bike is ridden, possibly causing injury to the rider.
Quick-release wheels use a hollow hub axle fitted with a shaft, a lever that operates a cam mechanism, and an adjusting nut. The cam puts tension on the shaft and pulls both the cam and the adjusting nut tight against the dropouts. This tension is what holds the wheel securely to the frame. The adjusting nut determines the amount of tension on the quick-release lever and cam. Lubricate the cam mechanism if it appears sticky or dry.
The quick release is fitted with two conical shaped springs. The small end of the spring faces the axle, and the large end faces outward. These springs make the wheel easier to install. If one or both springs become twisted or damaged they may be removed. The springs serve no purpose once the wheel is tight on the bike.
The small ends of springs face the hub.
Installing Wheels With Axle Nuts
Wheels may also be held on with axle nuts. The rear dropouts may also have a derailleur hanger that bolts to the dropout. There should be a bolt and nut that holds the hanger to the frame. The wheel installs over the derailleur hanger. The axle will bottom out against the back of the slot in the derailleur hanger. However, the left side of the axle will not go all the way to the back of the dropout slot, which is fine. It's because the right side is displaced forward by the hanger.
Center the wheel and fully tighten the nuts to secure it.
Front wheels on some bikes may include tabbed also washers. If so there will be holes in the fork one either side that receive the washer tabs.
Tools Needed?
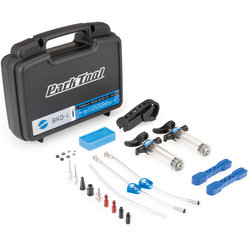
If you find yourself in need of tools to help you with any of the above recommendations we suggest using Park Tools.
Park tools have been the top choice of pro and home mechanics for decades.
If you feel you need held choosing what tools to buy we're here to help!

